CAR SPEAKERS HOW TO INSTALL
Standard Car Factory or Replacement
Speakers
Installing new speakers is the single most cost-effective
improvement you can make to your vehicle's audio/video system.
Not only are aftermarket speakers relatively inexpensive, they
are typically not difficult to install.
What Tools do I need to
complete the job
Each car presents its own specific
type of installation issues, varying on factory speaker
locations, mounting depth and height, and the vehicle's factory
wiring. Many installations are straightforward — a screwdriver
might be all that you require to complete the job. Other
installations can be more involved, particularly if you're
installing component speakers. I recommend a qualified car
installer if you have any doubt's about your wiring knowledge
and handy man skills with metal plastics and timber
composites
The tools
- Screwdrivers Phillips, stubby Phillips, flat-blade, magnetic or offset shaft screwdrivers
for 45 or 90degs corners
- Torx screw driver and bits
- Drill battery with screwdriver
and philips bits
- Metal nibbling tool
- Allen Key wrench set
- Metric /imperial Socket set
and spanners
-
Side cutters
-
Pliers
-
Wire cable stripping tool
- Soldering iron and solder
-
Crimping tool and utilux connectors
-
Panel removal tool
-
Retaining clip remover for the door handle removal (or
a screwdriver covered with a cloth )
- Round and square files
- Electrical tape
- Stanley blade knife
General Tips
Every car is different Here
are a few general tips to keep in mind as you plan your car
speaker installation.
Installation Hints
Fitting custom speakers requires drilling new screw holes,
cutting a small area of metal or plastic or filing
cardboard or plastic to make room for a speaker that is larger
than the factory opening in the door panels dash board or rear
parcel shelf
.
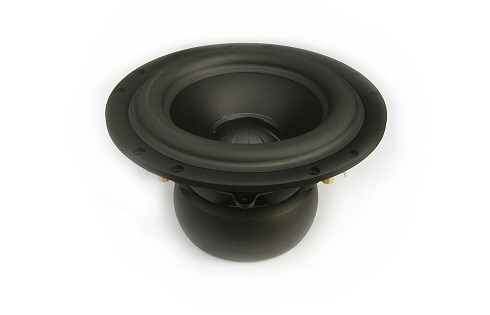
CAR Component speaker systems
Include separate woofers, tweeters, and crossovers. The
component woofers will install in your factory speaker
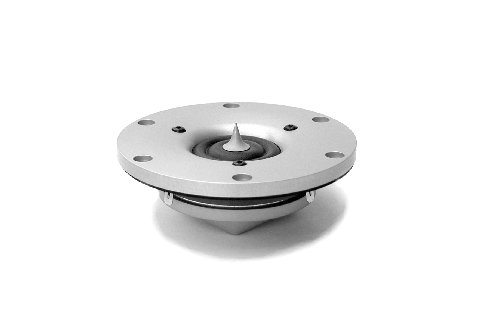
locations, but the tweeters usually require custom installation.
This typically involves drilling holes in the door panels or
dash, depending on where you choose to mount the tweeters.
Replacing dash speakers
Most dash speakers are easily replaced by removing the grilles,
which are held down by screws or friction fittings. You might
need to use a 90-degree (offset) screwdriver to get at the
screws near the windshield.
If the grille is held in place by friction fittings, carefully
pry it up. To avoid scratching or cracking the surrounding dash
as you do this, it's a good idea to put something broad and flat
(like a putty knife) underneath whatever you're using to pry up
the grille.
If the application of slight pressure is not enough to remove
the grille, proceed cautiously. In some cases the grille is
secured from below by screws, or by plastic studs which can
break with excessive force. In such cases, the entire dash panel
may need to be removed.
Remove the old speakers, making sure to note the polarity of
each terminal. (The speaker's positive terminal is the larger of
the two, and usually is marked with a "+" or a red colored dot.) Use
your wiring harness to attach the new speaker, or solder or
crimp the connections as your installation requires.
Russell's Hints on Car speaker installation to be
continued....................
"wow man whys that siren going and the light
show on the instrument panel happening shiz
I forgot to,,,,,,,,,
- Check that you have
not disturbed any door alarm sensors
or the electric window wiring harness check that
the speaker magnet and speaker frame fits into the
available space in the door
- If you go under or enter into the front dash board
instrument panel area I recommend a professional car
installer do the job for you as this is cheaper than the
cost an Auto electrician repair to a vehicle that will not
start run or you have lost the head lights blinkers and
instruments. If have the skills in fixing modern car
computer electrics then go right ahead .
- Check if
mounting Coaxial type speakers that the
protection grill does not interfere with the centre mounted
tweeter unit before reassembly of the door skin panel
-
Don't use electrical tape to insulate the
wire connections.
- Heat
shrink tubing is a good insulator can provide a secure
and reasonable water tight seal around and wires and
cables
- Check that the door electric
window or manual window wind up/down mechanism
system works and does not interfere the new speaker
magnet speaker frame or new mounting screws
- If you are
doing any electric welding disconnect the battery terminals
first but read the "car owners manual" first or you
may not be able to start engine or use the
electrical controls or the factory alarm system may lock you
out!! .
- Removing the
battery can change the car computer system control factory
settings for the engine management and alarms.
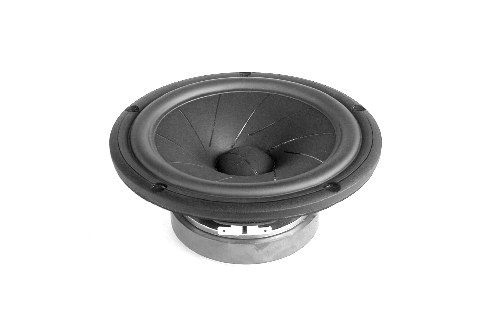
Replacing door speakers
In many cars, door speakers are the easiest to replace. In many
newer cars, manufacturers have notched a slot into the edge of
the grille. All you have to do is take a screwdriver, pop out
the grille, and unmount the factory speaker.
Some grilles are mounted by screws or friction fittings, and
require you to remove the screws or pry the grille to remove the
speaker. There are three basic steps to replacing a door speaker
in a vehicle like this.
Step 1. Remove the grille and factory speaker. Be gentle
with the speaker, since it probably is attached to a wiring
harness and you might want to reinstall the factory speakers if
you sell the car later. Some manufacturers also use a sealant or
foam when they first mount the speaker — you might need to cut
through that material with a utility knife.
Step 2.Unplug the factory wiring harness, and attach
the Crutchfield wiring harness to your new speaker's terminals,
again making sure that the polarity is correct. With the wiring
harness connected to your new speaker, simply plug the other end
of the harness into the factory wiring harness. If a wiring
harness is unavailable, you will need to solder or crimp the
connections. Test the speaker before you put it into place.
Step 3. Check one last time to be sure that all of your
wiring is secure, then screw the new speaker into place in the
factory mounting and re-attach the factory grille.
If you have to remove the door panel
In some cars, you'll have to remove the door panels to get the
factory speakers out. Start with
the window crank. Some are secured with a screw at the pivot,
which is sometimes hidden by a piece of snap-on plastic trim.
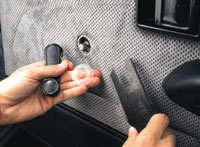
A panel tool can help you remove
window cranks without damaging your vehicle's interior.
|
Most, however, are held in place by a
spring clip. We carry an inexpensive
retaining clip tool designed to remove this clip, but with a
little more effort you can also do it using a small flat-head
screwdriver. Depress the surrounding door panel, look behind the
window crank, and rotate the handle until you see the spring
clip. Then gently push it off with the screwdriver.
After removing the window crank, remove the armrest (usually
secured with a few Phillips head screws) and any trim around the
door handle. The only thing holding the door panel on now should
be a half dozen friction fittings and possibly a few more
screws.
With all the screws removed, start at a bottom corner and pull
the panel straight out. Use our
trim panel tool or a large flat head screwdriver. Once the
corner is loose, work across the bottom of the door panel and up
both sides, again being careful not to use too much force. With
the bottom and sides loose, the panel should now be hanging by
some trim that sticks down into the window well. Lift straight
up and it should come free. Replace the speakers as described in
the previous section. |